

Setting it up on a Cloud OBS
By the end, your Cloud OBS will switch on its own to your low-bitrate scene or your offline scene when the feed drops, and go back to the normal one when you recover.
You need: any Cloud OBS plan · the server turned on · 5 minutes
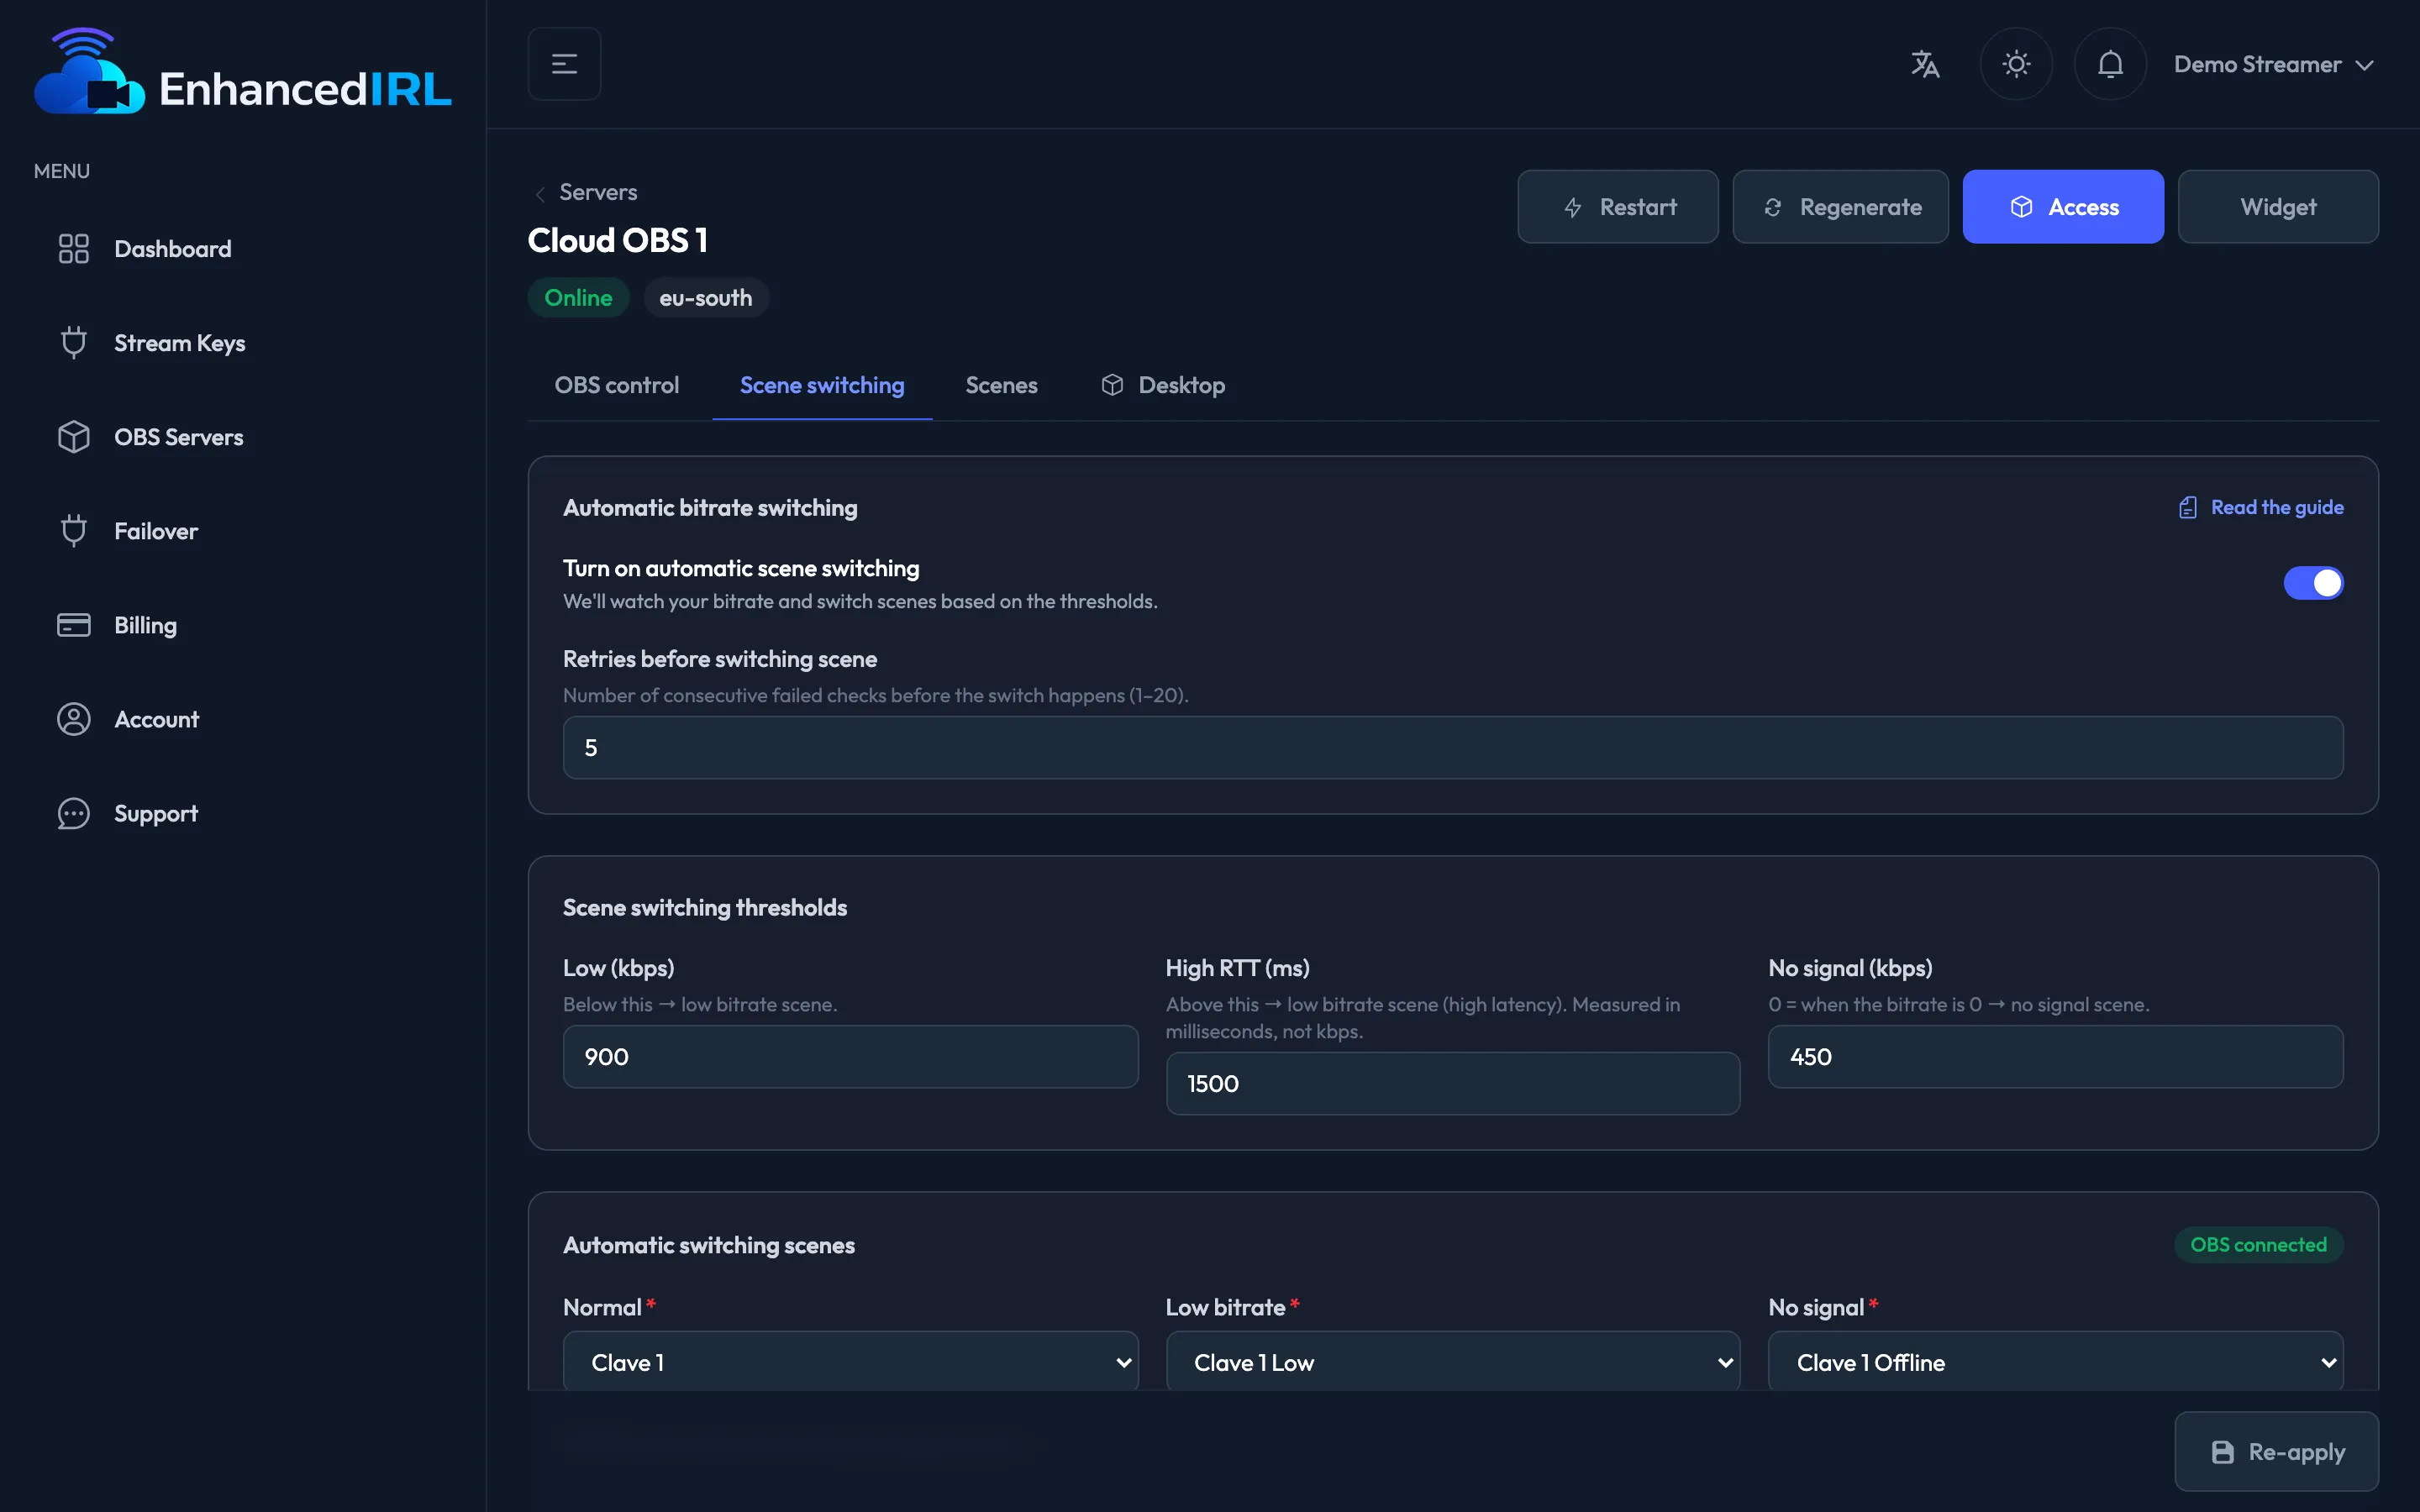
- Open OBS Servers and go into your server. Wait until it’s Ready.
- Go to the Scene switching tab.
- Under Automatic bitrate switching, leave Turn on automatic scene switching enabled.
- Check Retries before switching scene: how many bad checks in a row it takes before switching. It accepts 1 to 20.
- Under Scene switching thresholds, tune Low (kbps), High RTT (ms) and No signal (kbps) to your real bitrate.
- Under Automatic switching scenes, check Normal, Low bitrate and No signal. With the server online you’ll see the OBS connected badge and all three fields are dropdowns listing the scenes your Cloud OBS has.
- If you want, open Optional scenes (starting, ending, privacy…) and fill in the ones you use.
- Under Chat integration, pick the Channel for chat commands or leave it on — No chat —, and add your moderators under Chat admins.
- Hit Save configuration. You’ll see “Applying the changes on the server…” and, when it’s done, “Configuration applied.”
What it already comes with
Section titled “What it already comes with”A freshly created server doesn’t arrive blank: it comes with these values, which fit a stream of around 3 Mbps.
| Setting | Out of the box |
|---|---|
| Retries before switching scene | 5 |
| Low (kbps) | 900 |
| High RTT (ms) | 1500 |
| No signal (kbps) | 450 |
In No signal (kbps), a 0 means “only when the bitrate hits zero”. At 450 you react earlier, while there’s still a thread of signal coming in.
If you stream well above or below 3 Mbps, change them: Recommended thresholds.
The three scenes
Section titled “The three scenes”They come preselected with your stream key’s name: <key>, <key> Low and <key> Offline. They’re
the scenes your Cloud OBS already ships with, so the normal thing is to leave them as they are and
just dress them up to your taste in
Scenes and overlays.
The optional scenes are four and none of them is required: Starting soon, Ending, Privacy and Refresh. Use them if you already have scenes for starting the stream, closing it or covering it up for a moment.
The chat channel
Section titled “The chat channel”The Channel for chat commands is one of your Twitch streaming channels (the ones you registered under Account). It’s good for two things: letting your moderators give orders over chat and having the stream stop on its own when you raid or host.
Under Chat admins you add each moderator’s username, one by one. If you don’t want any of this, leave — No chat — and that’s it: scene switching keeps working just the same.
Command details in Chat commands.
Not working?
Section titled “Not working?”The badge says OBS desconectado and the scene fields are free text. The server isn’t online, so the dashboard can’t read its scenes. Turn it on from the detail page, wait for Ready and come back into the tab.
“Pick the normal, low bitrate and no signal scenes before saving.” One of the three is missing. All three are required.
“Couldn’t apply the configuration.” It didn’t land on the server. Try Re-apply, which resends the current configuration; if it keeps happening, open a ticket from Support.
Next step
Section titled “Next step”- Recommended thresholds — what numbers to use depending on how much you stream at.
- How it works — what it watches and when it decides to switch.
- Chat commands — what your moderators can do.